
Having a strong Google presence is important for any business. However, with 46% of all inquiries on Google being searches for local information, setting up a Google My Business page is absolutely crucial for local businesses.
This short guide will walk you through the process of registering your business to appear in local search results.
Before we begin:
Let’s begin by defining exactly what Google My Business is. GMB is a free tool that allows you to manage the way your business appears on Google Search and Maps, including your business name, hours and location as well as any other information you choose to provide.
Create an account and claim your business
Step 1: If you already have a Google account associated with your business, go ahead and log in. If not, they are free and easy to make.
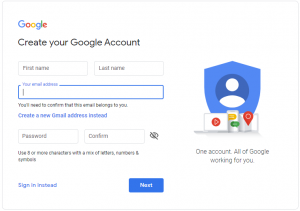
Step 2: Go to google.com/business and select ‘Manage now’ in the top right corner.
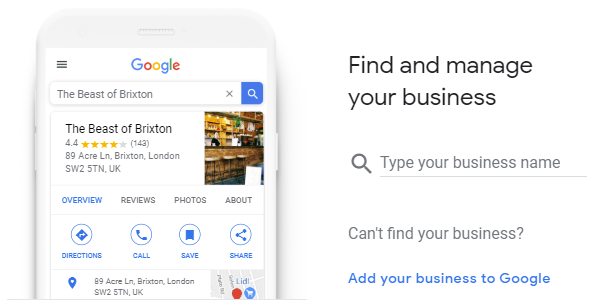
Step 3: Search for your business name. Your business may already exist in the database if you’ve been around for a while. If you are setting up for a new business or you can’t find your business in the search, click ‘Add your business to Google’.
Step 4: If you are creating a page for a new business, choose a category from the drop down menu and click ‘Next’.
Step 5: Next Google will ask if you’d like to add a location that your customers can visit (like a store or an office). If you use your home address for your business, you may choose not to list the location. If you do list the location it will show up on Google Maps and Google Search when customers are looking for your business. If you do have a business address, we do recommend adding the location. This will allow you to be visible on Google Maps and local search.
Step 6: The next question will be whether or not you serve customers outside the provided location. This usually refers to delivery. If you do offer delivery of your products you should click yes. You may also choose yes if there is a service that you provide to customers at their location.
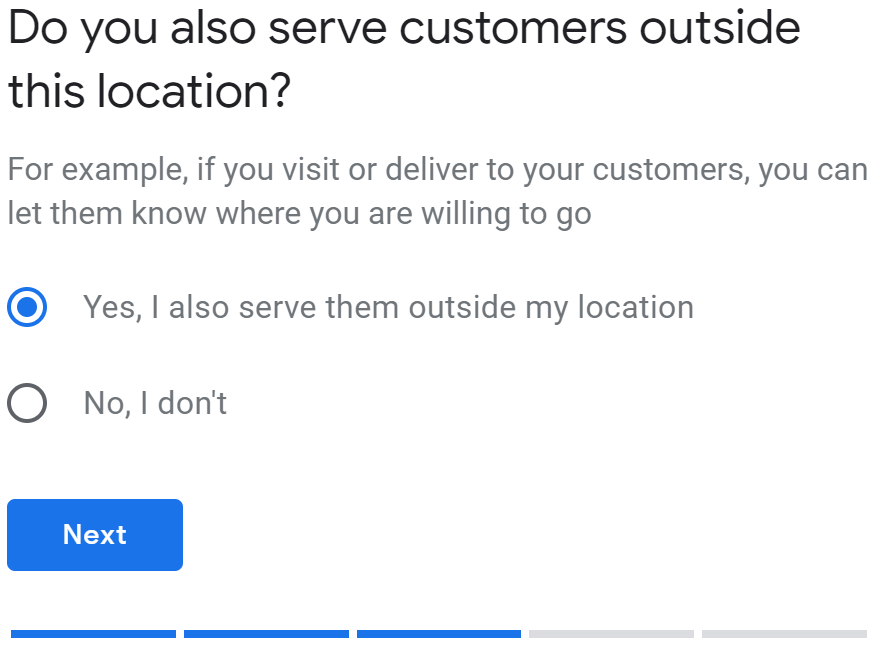
You’ll be able to add specific areas you service on the next page (if applicable). If your business serves multiple areas you can add more than one city. You may choose to add villages and suburbs, rather than an entire city if your business serves only a small local area. You should add as many areas as are relevant to your business, this way you will show up in searches for all of the areas your business serves.
Step 7: Nearly there! You can add your contact information, like contact phone number and website URL, on the next page. This will be visible to your customers when someone googles your business (so keep this in mind if you use a personal mobile number for your business). You do not have to add either, but both are important trust signals for potential customers and help your business to appear legitimate.
Step 8: Next Google will ask if you’d like to receive updates and recommendations regarding your business page. This can be changed later if you do change your mind.
Step 9: Finally, you’ll be prompted to finish your listing. You can now use GMB to promote your business, post photos, respond to customer reviews and track analytics.
Verify your business
Google will require you to verify your business in order to ensure that it is legitimate and registered to the correct address. Depending on your type of business, there are a few ways to do this, but the most common method is verification by postcard. If you choose this method, Google will send a postcard to the registered address with a special code. Simply log onto your GMB page once the card arrives and enter the code.
While you are awaiting verification it is important to note that you shouldn’t change your business name or address or you may have to start the verification process over again.
Optimising your Google My Business listing
Now that you’ve set up and verified your business, it’s time to ensure that you’re getting the most out of your profile.
Adding additional details
Any time you want to make changes to your profile, you’ll go to the GMB dashboard and navigate to the ‘Info’ section on the left-hand side of the screen. Once inside the dashboard, it is easy to add details such as business and holiday hours, products and services. This is also the place where you can add photos and a description. Generally, it is a good idea to add as much relevant information as possible.
Google allows community users to ‘suggest an edit’ to business pages, so you should periodically check your dashboard and make sure that all of the details are correct and appearing the way you want.
Adding photos
Did you know that GMB pages with photos see 35% more clicks to their website and 42% more requests for driving directions via Google Maps?
To add your photos, click the bottom of the ‘Info’ section or go to the ‘Photos’ section using the options on the left-hand side of the page.
At the top of your priority list should be uploading your cover photo and profile photo. The cover photo will be the first photo visible on your GMB page, so be sure to choose something that is a great representation of your business. Rather than using your logo or a photo of your storefront for your cover photo, we recommend using a photo of your product or service. Most businesses will choose to use their logo for the profile photo.
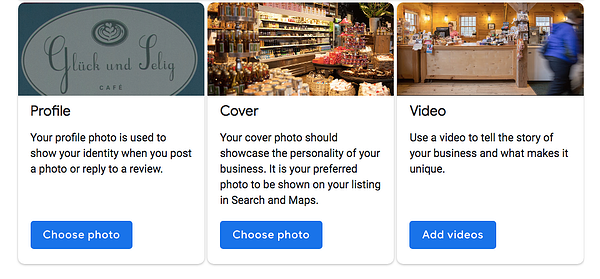
Google then has other photo categories that you can add to, including interior, exterior, team photos and others. Google has great some recommendations for what to include.
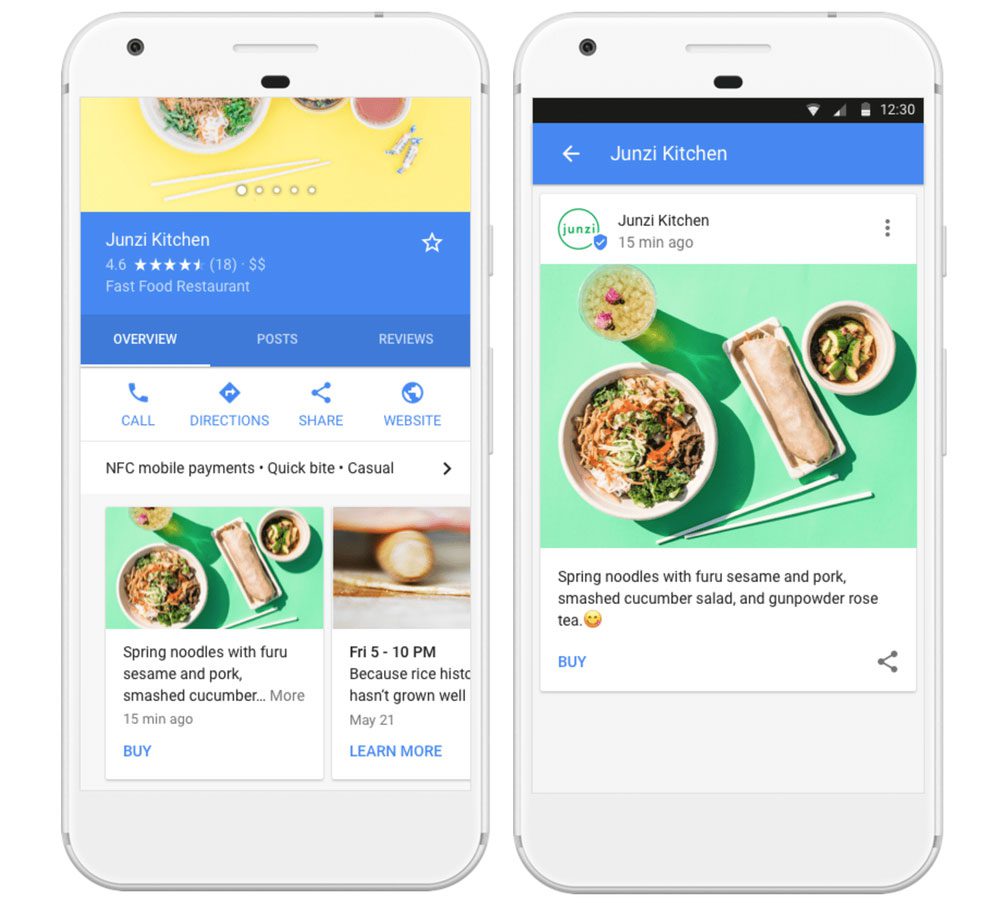
Utilising GMB Posts
You’ll find a section called ‘Posts’ within your GMB dashboard. Posts is a feature that allows you to add key updates on your business listing.
At the time of publishing this guide, the categories available include ‘COVID-19 support’, ‘COVID-19 update’, ‘Add Offer’, ‘Add Update’ and ‘Add Event’.
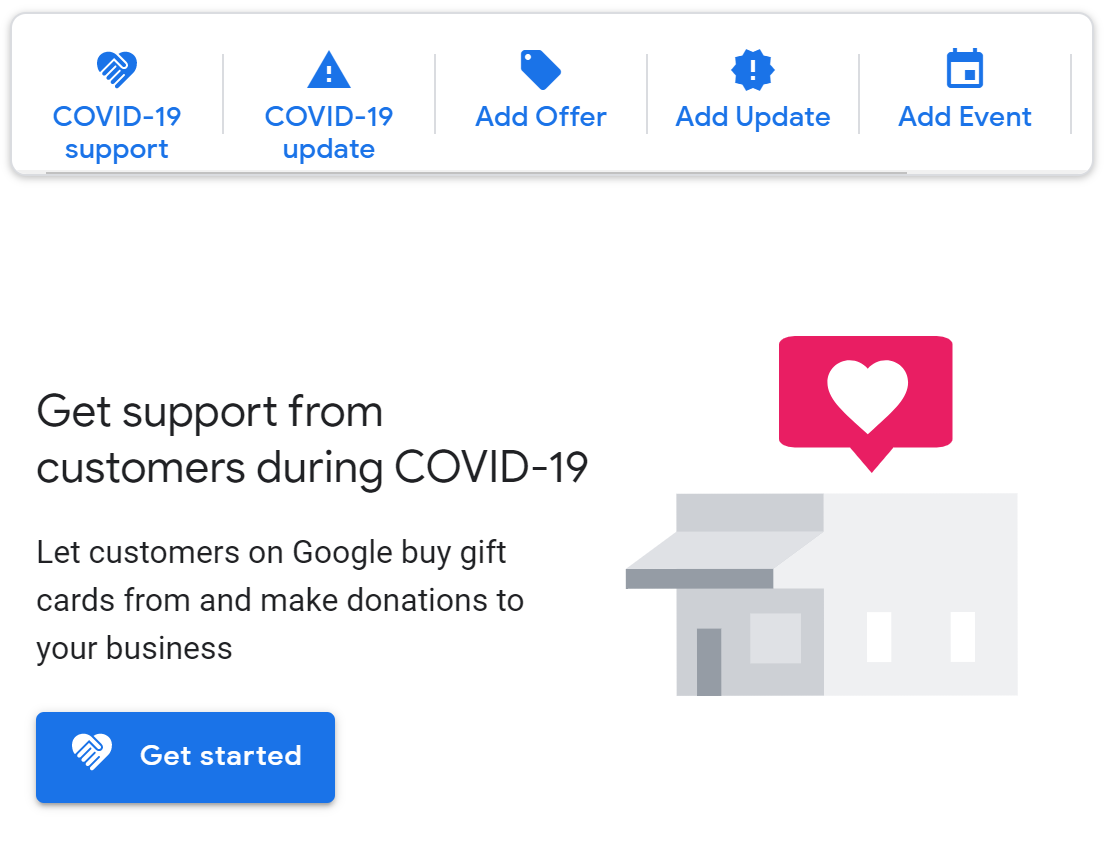
Once you’ve created a post, it is visible on your listing for only seven days. Posts are a great way to show your customers that you are an active business, so take advantage of this feature to post relevant and timely information.
Managing reviews
Reviews are a great way for you as a business owner to ensure you are properly reaching and engaging with your customers, as well as a major trust signal for your potential customers.

You should make an effort to encourage your happy customers to leave a Google review. Some do this by simply asking your frequent customers to leave a review. You can also include a link to leave a review on your thank you or follow up emails after a customer purchases from your online shop.
You’ll want to make an effort to respond to your customer reviews, even if they are negative. Doing this shows your customers that you care and gives your business authenticity. To respond to reviews just visit the ‘Reviews’ section in the GMB dashboard.
Getting a negative review is unfortunate, but remember that it is normal. You can’t please everyone! If you do get a review from an unhappy customer, make sure that your response includes an apology and suggests a way to remedy the situation.
Google My Business App
There is a smartphone app available for both iOS and Android to help you manage your business on the go.
If you’d like to learn more about setting up your own online shop, read on for more insights into running your own online business here.